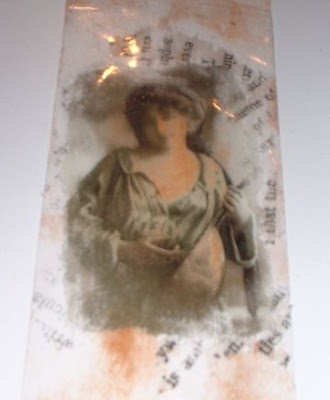
 Your image is now ready to use!
There are several ways to attach your image to your artwork. I like to use gel medium but you can certainly use a glue stick or double sided tape.
Here are some tips to remember when you are doing this technique:
1.) Make sure the surface that you are working on is free of any tiny particles (especially those tiny little holeless beads; these could leave lumps, bumps or grooves in your tape).
2.) Use a pair of decorative scissors to cut your image out.
3.) If your image is wider than your tape, you can place pieces of tape next to one another (so long as it overlaps a tiny bit). This seam will not show too much and will give it some depth and texture.
4.) If you get a wrinkle in your tape that is fine...burnish it well, that tiny line will not show too much.
Okay, you now know how to do it and we would LOVE to see your end results! Please post to the comments section with a link to your site, blog, or picture trail site and share your creation with us!
19 comments:
Amazing tutorial Lori - THANK YOU so much!!!!
Wow, you make it look and seem so simple! I will have to get brave and try this. Kathy Eddy
Thanks for a great tutorial!
Beautiful artwork too!
Fabulous technique. I've heard about it, but this step by step tutorial is much better. I've always painted Golden's gel over the image, but this seems quicker.
YOU'RE THE BEST!! Thanks so much!
Hi Lori__ Lost no time getting here from the group e-mails!!! Love it!! YOu did a wonderful step by step!!!Thanks so much for your generousity and way with tuts!!Hugs Jandee
Thanks so much for such clear instructions. I love this technique and think I need to go buy clear packing tape!
Hi Lori,
Wow, what a super tutorial and I love the results. Thank you bunches for sharing, I am hoping to try this tonight.
You write great tutorials :), makes it seem so much easier.
Maggie
Great tutorial Lori! You make it look eazy peazy! LOL. I'm definitely going to give this a try. Thanks for sharing.
Dianne K.
Thanks, Lori, for a very clear tutorial. I am eager to try this.
I love packing tape transfers. In August 2007 I posted three images to my blog using this technique along with a leafing pen. This is the link:
http://thealteredpage.blogspot.com/2007/08/image-transfer-daguerreotypes.html
Lori - thanks so much for posting this! I've done these before but never thought to add the extra papers and powders! Too Cool! Marva
Great Thanks for the tutorial will definately have a go with this!!!
Great tutorial Lori - I've tried this in the past but found the results rather boring but WOW you made it look great with the other elements mixed in there. Can't wait to give this one a try. Thanks for sharing!
Your tutorial is really easy and your work is beautiful.I've known your name from the yahoo group but had never seen your work.They are amazing! Thanks and congrats! from Claudia(Klauka from São Paulo,Brazil
This is really beautiful...can't wait to try it. Hope it turns out as well as yours did...
ok, i see now :)
AARR-HAAAR! So that's how it's done...thank you several times over...now I get it.
OK I'm running off to try this!
Terisa
Post a Comment