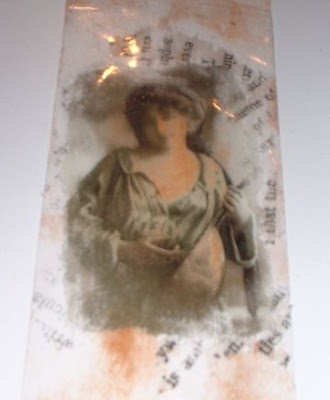
Your image is now ready to use!
There are several ways to attach your image to your artwork. I like to use gel medium but you can certainly use a glue stick or double sided tape.
Here are some tips to remember when you are doing this technique:
1.) Make sure the surface that you are working on is free of any tiny particles (especially those tiny little holeless beads; these could leave lumps, bumps or grooves in your tape).
2.) Use a pair of decorative scissors to cut your image out.
3.) If your image is wider than your tape, you can place pieces of tape next to one another (so long as it overlaps a tiny bit). This seam will not show too much and will give it some depth and texture.
4.) If you get a wrinkle in your tape that is fine...burnish it well, that tiny line will not show too much.
Okay, you now know how to do it and we would LOVE to see your end results! Please post to the comments section with a link to your site, blog, or picture trail site and share your creation with us!